The Problem with Vibe Coding
Chat-based AI coding falls apart on anything bigger than a single-file change. A feature that touches multiple files and needs new infrastructure isn't a single prompt. You end up in a long chat session, re-explaining context, correcting drift, and hoping the AI remembers what it was doing three messages ago.
Specs are Kiro's answer to this. Instead of a conversation that evaporates when the session ends, you get a document that defines the feature, breaks it into tasks, and lets Kiro execute those tasks autonomously.
How Specs Work
A spec lives in .kiro/specs/ inside your project. Each spec is a folder with three markdown files and a Kiro workflow configuration file:
.kiro/specs/add-user-invitations/
├── .config.kiro
├── requirements.md
├── design.md
└── tasks.md
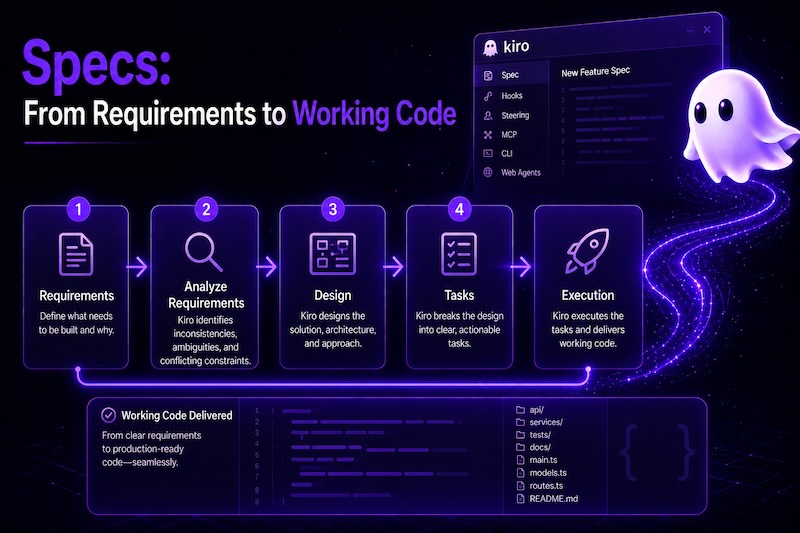
You can create a spec from the Kiro sidebar or by asking Kiro to start one in chat. Either way, the workflow moves through these phases: requirements, (optionally) analyze requirements, design, tasks.
Phase 1: Requirements
Requirements are structured as user stories with acceptance criteria. Kiro generates these from your description of the feature, then you iterate on them.
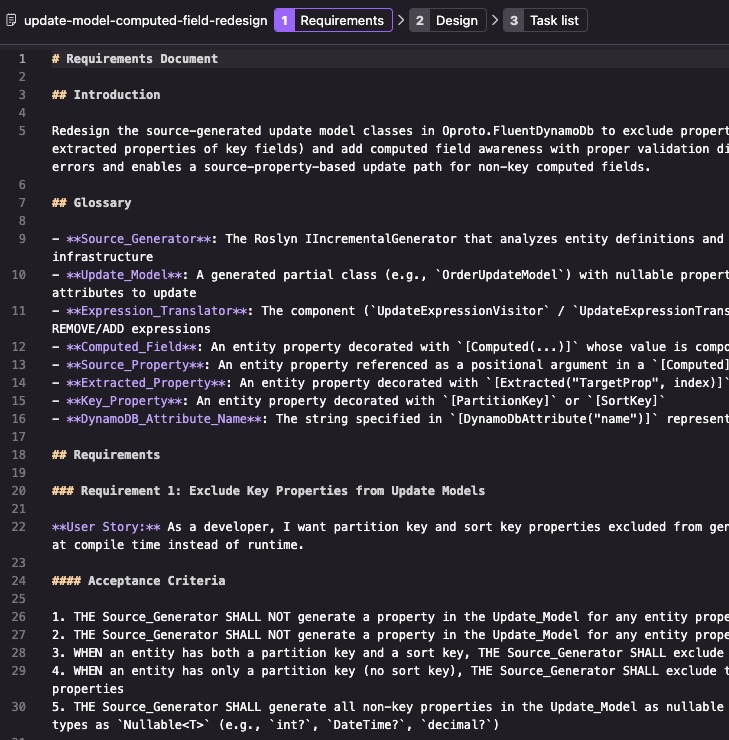
The acceptance criteria matter. They're what Kiro uses to determine when a task is done. Vague criteria produce vague implementations. Specific criteria produce testable code.
I usually let Kiro generate the first pass, then edit the requirements directly. Add constraints it missed, remove things that are out of scope, tighten the acceptance criteria. This is the design phase — you're deciding what the feature actually is before any code gets written.
When the requirements have been created, Kiro will ask to continue generating the design or to analyze the requirements.
Phase 2: Analyze Requirements
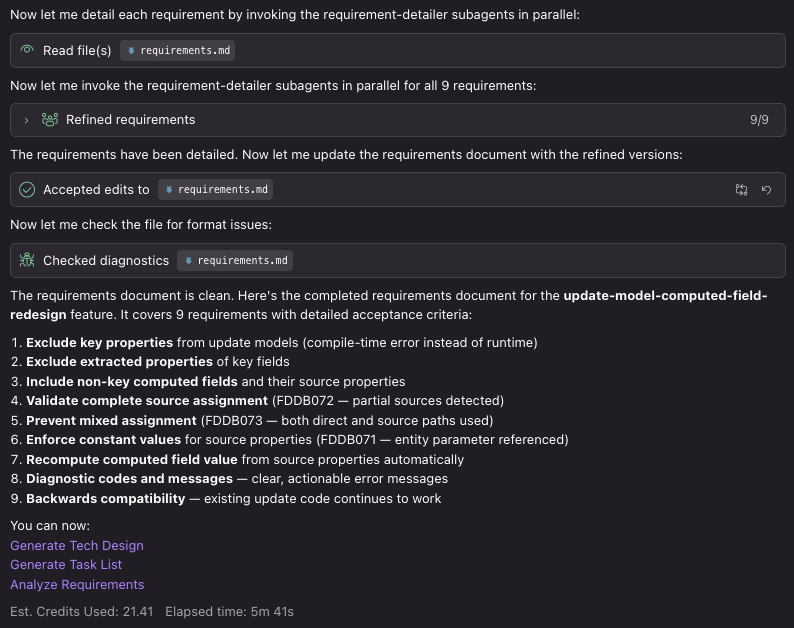
Before jumping to design, Kiro offers an optional step: analyzing your requirements for problems that are hard to catch by reading through them yourself. This isn't a grammar check. It's cross-requirement reasoning that looks at the full set together. It catches logical inconsistencies, ambiguities, conflicting constraints, unstated assumptions, and missing edge cases.
After requirements are generated, you'll see "Analyze Requirements" as an option in chat and in the Continue dropdown in the editor, alongside "Proceed to Design."
The analysis takes minutes, not seconds. As findings come back, Kiro streams clarifying questions into chat — each identifying the requirements involved, explaining the issue, and suggesting fixes you can select. You can also type a custom answer or dismiss a question if the ambiguity is intentional. As you resolve questions, Kiro updates requirements.md directly. For small or well-understood work, skip it and go straight to design.
I've found this step catches things I'd normally discover mid-implementation: a requirement that contradicts a constraint I added later, or an edge case that only becomes obvious when you consider two requirements together. Fixing these in the requirements doc takes seconds. Fixing them in implemented code takes much longer.
Phase 3: Design
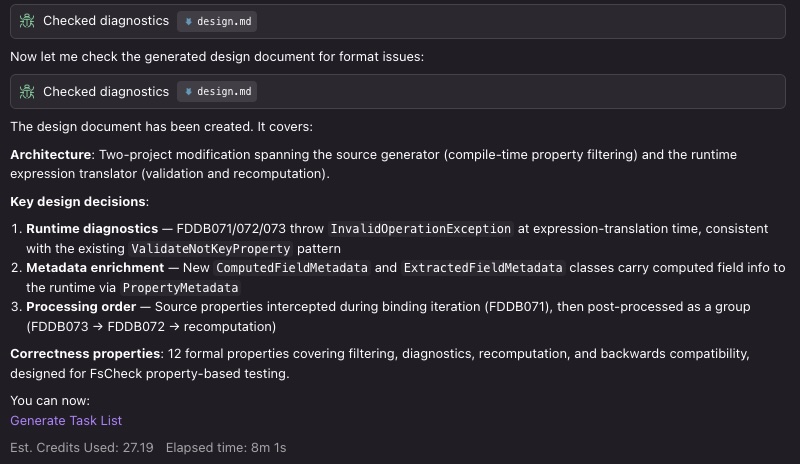
Once requirements are locked, Kiro proposes a technical design. This covers the implementation approach: what files change, what patterns to use, what the data model looks like.
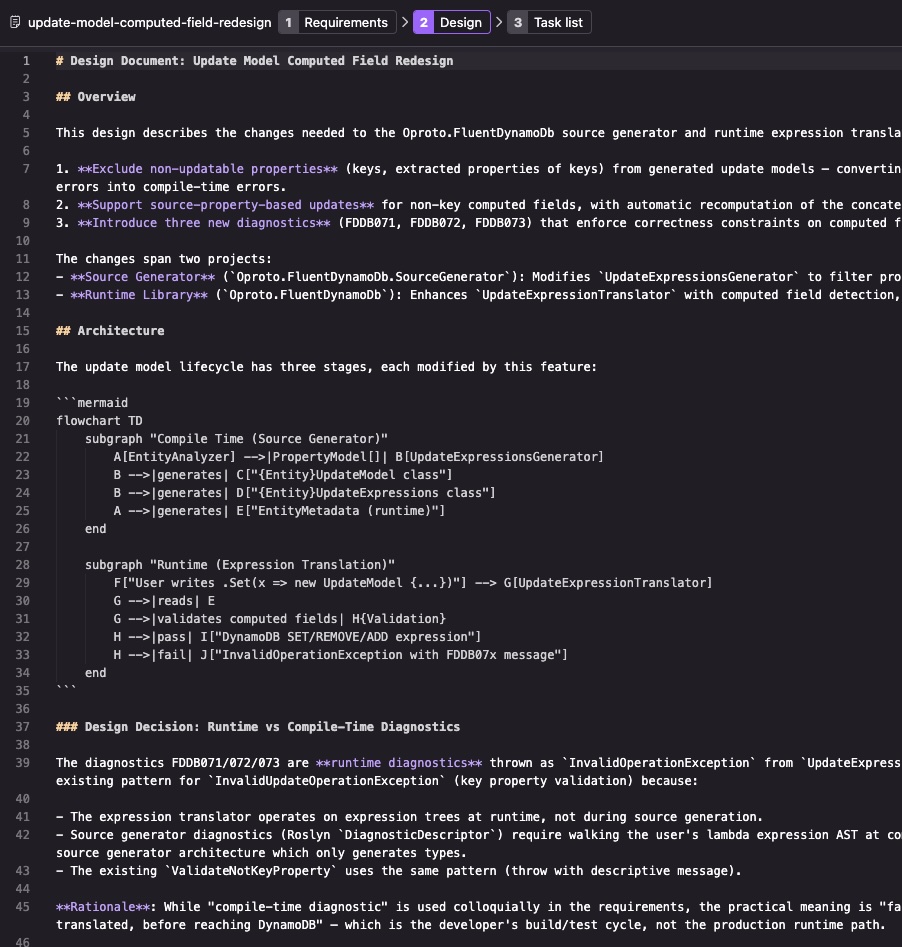
The design phase is where steering files pay off. If you have conventions for your data model, service layer, and API patterns, Kiro follows them here. The design it proposes should look like something you'd write yourself.
If it doesn't, edit it. The design document is a contract. Kiro implements what's in the design, so fix it before moving to tasks.
Phase 4: Tasks
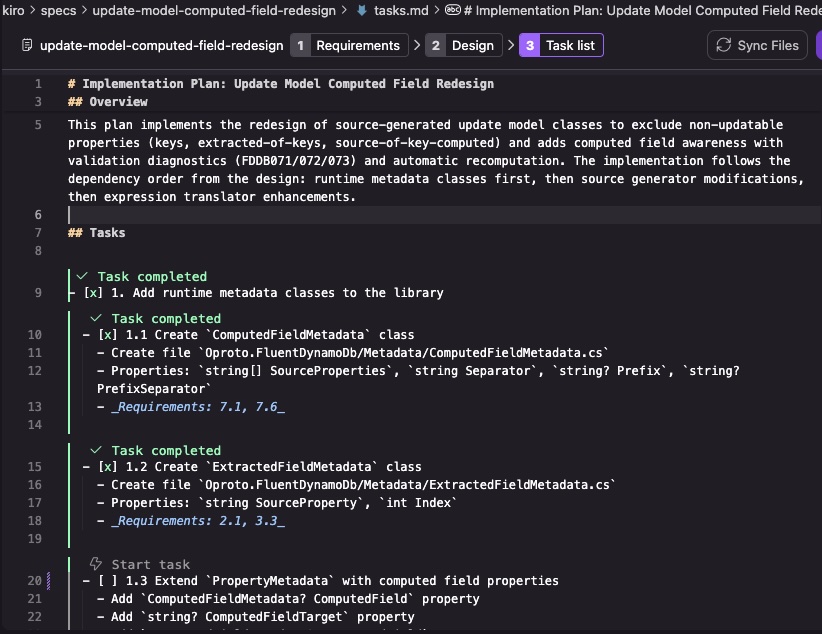
From the requirements and design, Kiro generates a task list. Each task is a self-contained piece of work.
Kiro groups tasks into waves based on their dependencies and runs independent tasks in parallel using sub-agents. Tasks within a wave execute concurrently, and the next wave starts once the current one finishes. In autopilot mode, this happens without you touching anything.
Execution
Once you approve the task list, Kiro starts working. In autopilot mode, it picks up each task, implements it, verifies the build passes, and moves to the next one without intervention. You can watch progress in real time in the chat panel.
If something fails, Kiro iterates — fixing compile errors, adjusting imports, resolving conflicts. If a task gets truly stuck (circular dependency, missing context), it stops and asks for help. This is rare if your steering files are good, but it happens.
When to Use Specs vs Chat
Not everything needs a spec. The threshold is roughly: if you'd need more than 2-3 prompts to describe the full scope of the work, it's a spec. Anything that touches multiple files or benefits from thinking through the design before coding. Single-file changes, bug fixes, and questions stay in chat.
Tips from Real Usage
Edit the requirements aggressively. Kiro's first pass is usually 80% right. The 20% it gets wrong — missing edge cases, over-scoped acceptance criteria, assumptions about your architecture — will carry through to the code if you don't catch them here.
Your steering files do the heavy lifting. A spec in a project with good steering files produces noticeably better output than the same spec in a bare project. The spec says what to build. Steering says how to build it. Both matter.
Review the design before approving tasks. The design phase is your last chance to course-correct cheaply. Once tasks start executing, you're reviewing implemented code instead of a plan. It's much faster to fix a design doc than to undo three completed tasks.
A Real Example
Most of the features in Oproto were built with specs. A typical one: adding audit logging to the service layer. The spec had 4 requirements (what gets logged, where it's stored, how it's queried, retention policy), a design that mapped to our existing patterns, and 9 tasks covering the entity, service, API endpoints, CDK changes, and event publishing.
Total execution time was about 40 minutes in autopilot. I reviewed the output, made two small adjustments (a key format that didn't match our convention, and a missing index), and merged it. The equivalent manual work would have been most of an afternoon.
That's the point. Not "AI writes code for you" — every tool does that now. It's "AI implements a designed feature end-to-end while you do something else."
What's Next
The next post covers Hooks: how to automate actions that trigger on file saves, tool use, and task completion. Hooks are what turn specs from "Kiro implements code" into "Kiro implements code and then verifies its own work."